facebook instagram youtube
Powered by Blogger.
  • Home
  • Life
    • Life Stories
    • Home Decor
    • Cleaning
  • Recipes
    • Food
    • Crockpot
    • Baking
    • Desserts
  • Holidays and Parties
    • Holidays
    • Elf on the Shelf
    • Brighton Elves Instagram
    • Halloween
    • Parties
  • About
  • Alice Scraps Wonderland
  • Bella Fleur

This Bittersweet Life

For those that have been following along, you'll know that my mom and I took care of my elderly Oma (grandmother) until she passed away. After she passed, we both started fresh. We sold both houses and my mom bought a brand new house, built to her specifications. That was a huge step for all of us, but especially for my mom. That was her first time ever selling or buying a home.

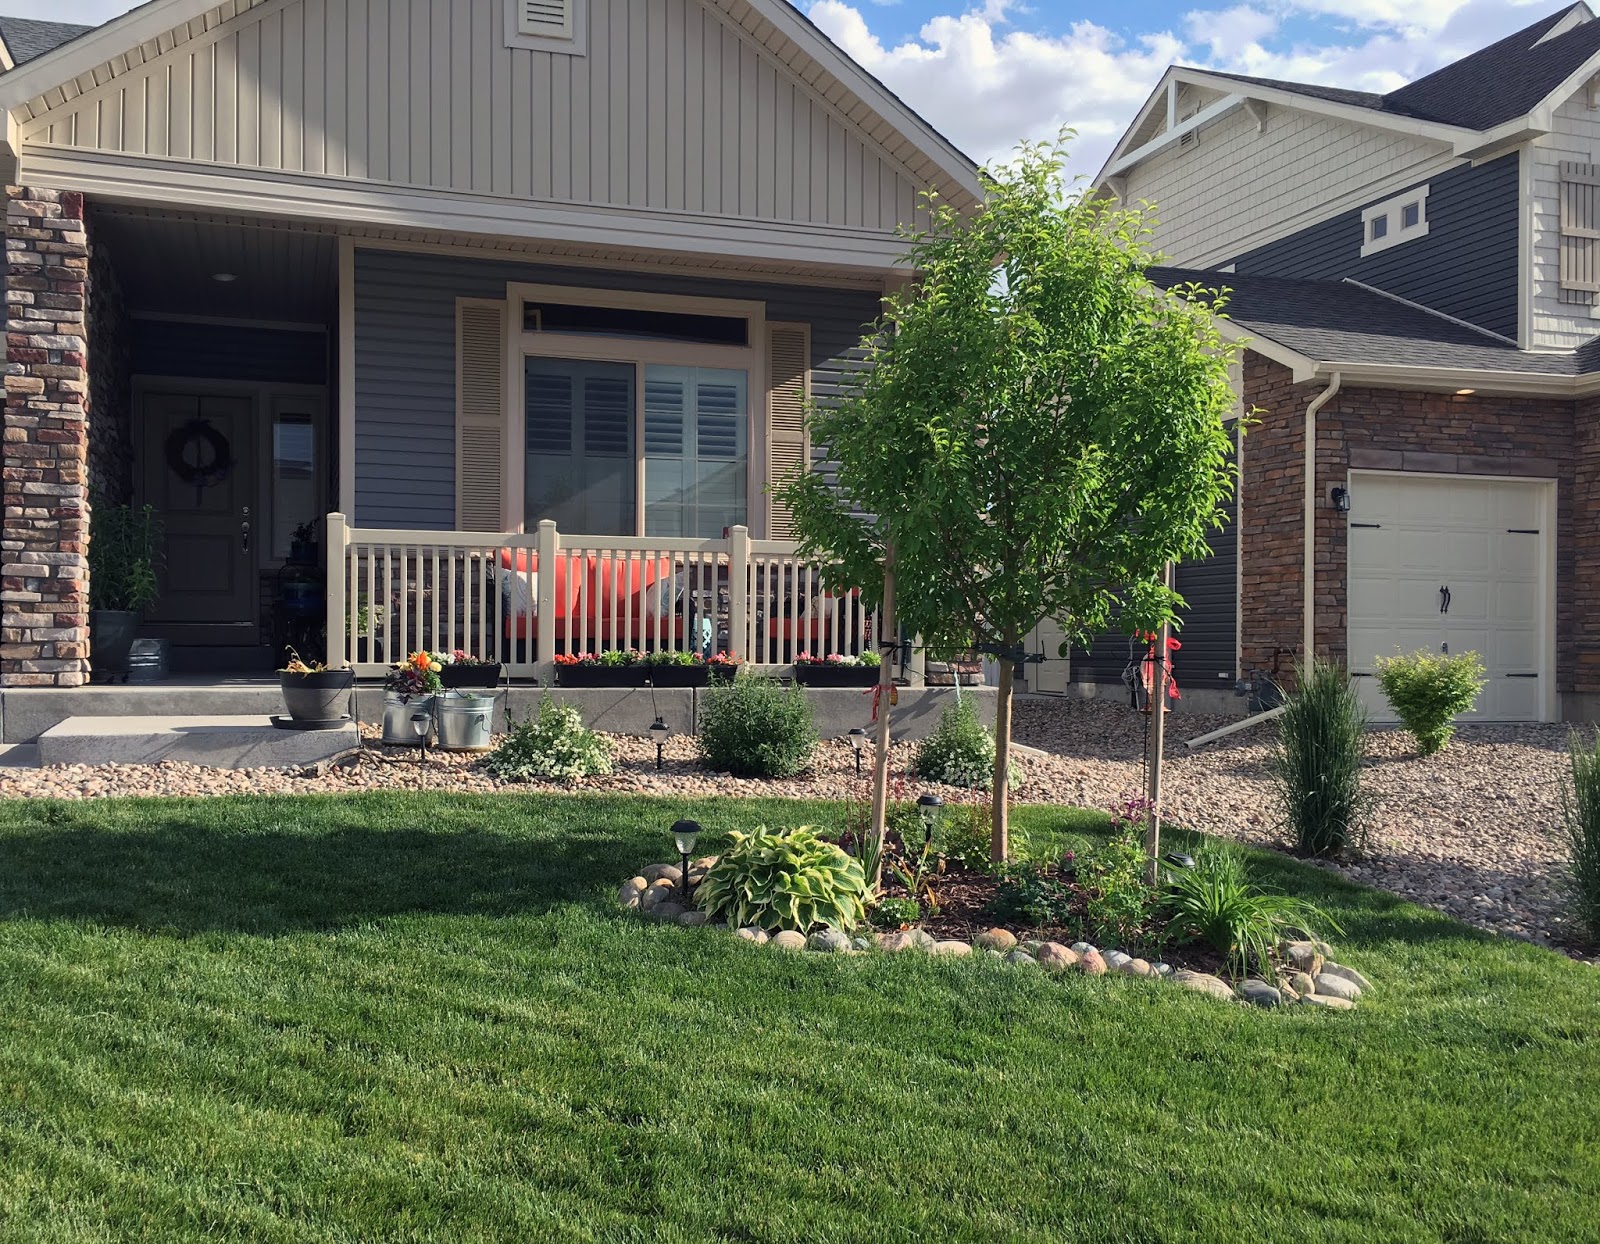
Our home prior to the devastating hail storm.

It has been 3 years since my Oma passed away but when I think back on those days of taking care of her, it seems like just yesterday. But so many things have happened, including that giant hailstorm that hit us, causing tons of damage to our house. That was last June. It's been almost a year now and we are still working on getting all of the damage repaired, as are many of our neighbors.

The siding looked like some hit golf balls at it. I described it as Swiss cheese. 

So far, we've had the windows, roof, gutters and fencing replaced. Recently we had the first layer of stucco put on our house. Like many of our neighbors, we decided to stucco the whole house in the hopes that it would be more durable in a massive hailstorm were we to be hit again.

The hail broke 2 windows and one window frame. 

But getting here has been a fight. Luckily our contractor has been amazing. So many of the insurance companies were overwhelmed with claims that they hired a lot of new adjusters. The person who did our adjustment had never done one on his own before. Something was off in his measurements and so the insurance company only awarded my mom $200 to reside her house. That wasn't even enough to do what all needed to be replaced. Our contractor fought for us and ended up getting my mom the money she really deserved. It was enough that we were able to afford stucco instead of replacing broken vinyl.

Our baseball sized hail stones. 

But in Colorado, it's cold during the winter and you can't do stucco when it's below 50 degrees. It took a while to get to this first layer of stucco. In fact, our house sat with the chicken wire on it for quite some time before they were able to stucco our home. It was covered in the wire just before Christmas and we just finally got the first coat of stucco on in early March! Now we wait 5 days for it to cure before they apply the color coat. But we will have to wait for another nice day.

Our house during the holiday season, partially covered in the water barrier and the chicken wire. 

I know what you are thinking, if you are someone who does not live in the Rocky Mountain region. "But it's spring! You should have plenty of nice days now!" No. The answer to that, is no. That old saying of "April showers bring May flowers" does not apply to the Rocky Mountain region. It's more like "April snowstorms bring slightly warmer days in May." April is the snowiest month in Colorado. Even tulips don't generally show up until late May. Planting flowers on Mother's Day in Colorado is like playing Russian roulette! There is always a chance of a late freeze.

A close up of the chicken wire. They use foam to mold the pop-outs around the doors and windows. 

And if this March has been any indication of what April will be like, then our mountain towns are in for a doozy of an April. But I live in a valley in the foothills on the front range so snow is more mild for us, unless there is an Albuquerque low, in which case that means it's a blizzard and my little valley gets buried under 5 and a half feet of snow. But even when our snow is more mild, the temperatures are still bitterly cold.

But we are patient and willing to wait. We want the stucco done right and not falling off in chunks because it was put on when it was too cold for it to properly cure and dry. But once the stucco is complete, all we'll have left is the banister on our front porch, our garage door and the facia trim on the roofline! Like everyone else in the neighborhood, we are excited to be finished with all of the repairs and move on--it has been nearly a year since that hailstorm.

My garden in the backyard after the hail storm. I hope the plants all grow back strong this year. 

After the house repairs, it will be a wait and see game with my gardens. Did my peonies survive? I hope so. My hosta seemed to recover quite nicely, but peonies are finicky. And I'm so ready for spring in my garden, the lush greens and colorful petals, the sweet scents of flowers on the breeze. I'm still hopeful.


1:00 AM No comments
Telling people I live with a chronic pain condition isn't something I enjoy shouting from the rooftops. Mostly I hate the looks of pity people give me, or the exclamations of "But you're so young!"(I know, thanks for reminding me...) I'm also still very afraid that if I say something about having a pre-existing condition, that I won't be considered for a job or I will be fired from one. Though it is illegal, it still happens. "She won't be able to handle it" or "Her health insurance is so expensive" are phrases that come to mind. I also hate when people diminish my pain. When others tell me about their unusual amount of pain or exhaustion, I tell them I can relate, as a way of saying I understand, I know it hurts. But the responses I get are usually "But you're used to the pain, I'm not." No, actually, I never get used to it. I have just learned to live with it. That doesn't make may pain and exhaustion any less uncomfortable.

A rare day when I actually wore makeup and painted my nails for no reason at all.

But I'm at a point in my life now where the disconnect between how people view me and how I view myself is too great to bear. Advocacy for myself and fellow chronic pain sufferers, or "spoonies" as we call ourselves (read the spoon theory here), is the only way to bridge the divide. Some people see me as a liability, some as only half of a person, some think I should ignore my condition and it will magically disappear, while others put pressure on me to do as much as I can and live life as much like a normal, non-chronic pain suffering person would.

But I'm none of those things. I'm not a liability, but a person who is able to see things from another perspective. I'm a full human being wanting to live a happy and as full a life as I can--just like anyone else in this world. But I am not a normal, healthy person and I most certainly cannot just pretend this chronic pain condition doesn't exist. It's constantly there, reminding me it does exist with burning pain, stabbing pain and the cracking of my joints every time I move. And not caring for myself and that condition, only serves to make the pain worse.

Over the years, I have learned my limitations and I respect them. Though that doesn't mean sometimes I won't overdo it; I know full well that I will reap the consequences later. Balancing my life is, as with anyone, a life-long learning experience. My consequences are both physical and emotional pain.

I began noticing symptoms of Fibromyalgia in my preteen years and I wasn't diagnosed until I was 18. I underwent multiple blood tests to no avail. My doctor tried a high calcium regimen but that did not help. I was always exhausted but I woke up dozens of times a night. My mom was worried about me, which is saying something. She was the kind of mom that sent you to school after having you take some cold medicine, that 101 degree fever be damned. My doctor referred me to an orthopedic specialist. She noticed that my joints and muscles were more out of balanced than usual for a teenager, but that wasn't causing my pain, probably only worsening it. So she sent me to a rheumatologist. After listening to my symptoms and doing what is called a "tender point examination," I was diagnosed with Fibromyalgia (FMS), a body-wide chronic pain condition that effects every system in my body.

It was only about 35 years ago that people thought FMS patients were just crazy and sent them to mental institutions. There was no X-ray or blood test that said anything was wrong with them, so they must be crazy, right? To this day, still no one knows what causes FMS, though there are a dozen theories and no real treatment for it. Patients are usually prescribed anti-depressants, sleeping pills, nerve inhibitors, muscle relaxants, and when it's really bad, opioids. Doctors usually write the prescription, pat you on the back and send you on your way with a cheery "Good luck!"  At least we are no longer locked up in mental wards, though there are still plenty of people out there who think it's a fake disorder.

That is probably thanks to the fact that it is considered an invisible illness. To look at me, you wouldn't think I'm sick. I don't have any physical show of illness and I smile through my pain. Most people when they ask "How are you doing?" don't really want to hear how you truly are doing, it's more of a way to say hello. So I often smile and tell people I'm okay or I'm hanging in there. On the inside, I'm actually screaming in pain. And who wants to listen to you complain about all your pain over and over again anyway? (But I just want my friends to know, that when I ask you how you are, I genuinely want to know how you are doing.)

I may be smiling, but don't let that fool you. I was in a lot of pain the day I took this photo.

For most, treating FMS is a battle you fight on your own. You have to take initiative to do research and try things. Some have found relief in massage and yoga, others acupuncture or a change in diet. Some Fibromyalgics are in so much pain that they are bed ridden. No two FMS patients have the exact same symptoms so different treatments work for different people. I, thankfully, am not bed-ridden. However, I am part of the weird group of FMS patients (about 2% of the FMS population) that feels pain more often in my joints than in my muscles. And no medication I've tried seems to work and I cannot afford yoga classes or massages.

But any Fibromyalgic would tell you that FMS is so much more than chronic pain. Rather than listing off a bunch of symptoms, I'll take you through one of my days. As a healthy and normal person, I don't want you to read this and pity me. I just want you to read it and understand it. If you are a fellow spoonie, take comfort in knowing you are not alone in your suffering.

In the morning, I wake up to the sound of either my alarm or my dogs whining to go out. I pry open my eyes, squinting at painful sunlight that literally makes my eyeballs hurt. My mouth is dry and I can't speak. I lay in bed for a minute, allowing myself to acclimate to all the sensory information overloading my brain: smells, sounds, light--all of it is overwhelming. I clumsily silence my alarm if it is ringing. When I sit up, nearly every joint in my spine cracks. My muscles are all stiff and sore, despite sleeping on a memory foam mattress. I feel like I've been run over by a train. My brain is moving at slower than a snail's pace. I usually lose my balance trying to stand up and trip around my own feet going to the bathroom. I'm still working out the kinks and bending my knees and ankles is almost nonexistent at this point as I walk awkwardly to the bathroom.

I don't turn on the light in the bathroom, the light would be too much. When I sit down on the toilet, both of my knees give a loud pop and pain shoots up through my thighs to my hips and down my calves to my ankles. When I stand back up, I lose my balance a bit again and my muscles scream as they stretch.

No makeup and just some comfy clothes. My dogs bring me comfort when I need it most.

I walk to my bedroom door and let me and my dogs out of the room. Light from my loft window assaults me when I open the door. I'm still walking funny as my muscles and joints are still extremely stiff. I begin to go down the stairs. Each stair causes my ankles to pop. There are 15 steps. The dogs are patiently waiting at the sliding glass door for me to let them out, they make it down the stairs long before I do. During the summer months, opening the door doesn't cause discomfort. But during the colder months, opening the door means exposing myself to the cold and cold causes my joints to hurt more. Every joint in my body burns with pain when that cold blast hits me. One of my dogs is still young and learning so getting him to come in when I call is still an issue sometimes. That means I have to go outside to corral him. Then I need to bend over and put on my boots. My teeth clench with the pain as I do this.

Stepping out into the cold air is even worse, even if it is only minimally cold. Breathing it in hurts. Moving in it hurts. Speaking to my dog before I've had anything to drink hurts--it feels like my vocal chords are on fire when I speak. I shoo him inside after finally getting his attention. Once the door is closed, I'm only given small relief. It takes some time to work the cold out of my bones. I take off my boots and head to the coffee machine, joints popping and muscles screaming as I go.

No makeup but I felt well enough to trek up the hill on my Oma's property this day, even though it was a bit windy and a storm was moving in. 

I reach up for a coffee mug and my shoulder catches. The pain causes me to gasp. I start making coffee. Shaking the coffee creamer causes pain in my elbow and shoulder. Reaching for the dogs morning Greenie causes the same pain as reaching for a coffee mug. Bending my arm to place the bones in my pocket causes my elbow to pop. I take the Greenies and my coffee upstairs. Fifteen steps, 15 ankle pops. Any small amount of exertion causes air hunger in Fibromyalgics. You can be in the best shape of your life, but you'll still sound like an out of shape rookie after your first marathon attempt. I huff and puff like that when I reach the top of the stairs. Sometimes I get a little dizzy and disoriented from it. I have to stop when I reach the top before I can walk into my room. When I get to my bed, I reach into my pocket to get the Greenie bones and my elbow pops again. I set down my coffee mug and my muscles ache. I give my dogs their morning treat and my muscles scream from stretching. I sit down on my bed again and my knees pop.

At this point, all of my joints are on fire and my muscles ache and burn. I reach for my remote and turn on the news. My elbow pops, knuckles pop. Lifting my coffee mug hurts, my shoulder occasionally pops. Swallowing hurts. But the dryness if finally leaving my mouth. It doesn't hurt as much to talk to my dogs now. I spend the morning sipping coffee and listening to the news and using my phone to look at emails and social media. I take my time because I hurt so much. How much I push myself in the morning sets up the rest of my day and how much pain I will be in later. It's important to take it easy. During this time, I deal with my allergies that seem to be year-round now. I blow my nose and cough from drainage, both of which are painful for my chest muscles.

When I do get up for the day, I head to my closet, joints still popping and muscles still aching. I pick something out with comfort in mind. Is my Allodynia flaring today? If it is I pick loose jogging or sweat pants and a loose shirt so that the seams don't bother me. If not, yoga pants and a basic T-shirt. On days when my Allodynia is particularly bad, just the weight of clothing on my skin is severely painful. Those days are spent in bed, crying in pain, because what else can I do?  I've even had to switch to bras without underwire. They don't hold me up as well but the pain from the underwire hitting tender points right under my breasts is too painful. After 30 minutes of wearing an underwire bra, it feels like someone punched me in the chest twice. I usually forgo underwear at home. The close fitting fabric and seams can rub and cause pain.

Comfort and warmth. Another rare selfie with one of my dogs. I've gained a lot of weight and hate photos of myself.

In the late morning I finally get hungry. Eating too early makes my stomach get upset. I make myself something simple-- an egg sandwich, a smoothie or yogurt and granola. When I'm cold I make oatmeal. When I'm exhausted, a bowl of cereal will suffice. Every movement causes pain. Those 15 steps aren't as bad the second time I take them. My ankles pop every couple of steps now. Chewing my food is painful, swallowing it is just as painful. I have to sit for a few minutes after I'm done. Getting up causes pain, walking causes pain, bending over to put my dishes in the dishwasher causes pain.

I work from home and make my own hours. But I like to get started in the morning. Going to work just means going up the stairs. Again 15 steps and air hunger at the top that makes me dizzy. I go to brush my teeth before I start work and the back and forth movement causes pain. The taste of the toothpaste is overwhelming most days. It's like my senses are on fire. On rare occasions it causes my tongue to twitch.

Sometimes I'm at the computer doing contract social media work or creating graphics and updating websites for my music groups. Sometimes I'm at my scrapping counter. Either way, I'm usually in one position for a long period of time. Typing causes pain in my hands, fighting the stiffness in my knuckles. A searing pain on my side just under my armpit and around my back to my spine flares every few minutes. I suffer from constant lower back pain. Every time I shift my position, my joints pop when I bend them. When I work standing at my craft desk, my feet and calves hurt. Bending joints causes them to pop. Twisting caps open hurts my wrist and fingers. Just think of me as an old lady. Opening anything is painful and difficult.

By lunchtime I'm stiff and sore. Making my lunch causes the same pains as making breakfast did. Reaching, stretching, bending, it all causes more pain. It's just pain building on top of more pain on top of more pain all day long. I take it easy when eating lunch. Again, chewing and swallowing my food causes pain. Getting my dishes to the dishwasher causes more pain.

If I haven't finished working, I go back upstairs. I reach the top and have to stop to catch my breath again. My chest muscles and knees are screaming. It feels like they are on fire. I work through the pain and the popping and cracking. Other days I run errands in the afternoon. The extra walking causes pain, especially in my hips. Once a week I have a flute quartet rehearsal in the late afternoon. Playing the flute causes a whole other set of pain issues, but more on that later.

It was a lazy weekend day for my sister, mom and I when we suddenly decided to go check on the process of my mom's new house being built. I'm happy when my sister "slums it" with me. Then I don't feel so guilty for wearing jogging pants and a T-shirt. (Thank you to my brother-in-law for taking this photo!)

At this point, I've spent the day alone with my dogs for the most part. Close to the time my mom comes home I do a mood check. Do I have control of my emotions today? As a Fibromyalgic, my body can't regulate my hormones very well and that can cause severe mood swings. A person waving hi to me across the street can set me off but right now, I'm on birth control and it does a wonderful job regulating my hormones. But on my period weeks, I have to watch it. If my mood is out of control, I spend 30 minutes bringing it into check, because once I'm set off, I can't control it and I know it, which only makes it worse.

When my mom gets home in the evening, she's pretty exhausted from work. On nights I don't have a music rehearsal, we make dinner or eat leftovers. We spend the night chatting, watching the news and sitting and relaxing. We both need it at this point.

On Monday and Tuesday nights, I have rehearsals for two music groups I'm in. I change into more suitable clothes for all my rehearsals. I don't want to show up looking like a slob so I put on a nice shirt and a pair of stretchy jeans. I sometimes put on jewelry. Necklaces and bracelets are the easiest. Sometimes my fingers are too swollen for rings. I only wear earrings on special occasions like for concerts. They bother my ears too much otherwise. The only piece of jewelry I wear all the time is my nose ring. It is the smallest gauge possible to keep it from irritating my skin. I wear makeup to concerts and occasionally out when I'm having a better day. But most days, I forgo the extra work.

Each rehearsal lasts at least two hours. Monday nights aren't as bad. I'm tired by the time the two hour rehearsal is done and I'm in lots of pain. My spine feels like it's been through a trash compactor several times. My hands are swollen and painful and my knuckles are bruised.  I'm stiff from sitting for so long.  But I still have to walk to my car, usually in the cold, and still drive home. On Tuesdays, I'm still dealing with the pain from Monday's rehearsal. This is flute choir and for this group, I play bass flute. It is large and heavy and my hands are small and my fingers short. Playing bass flute is more painful than playing concert flue and piccolo like I do on Mondays. By the end of the Tuesday night rehearsal, I'm thoroughly exhausted and in a ton of pain. But again, I still have to walk to my car and drive home.

My friend, Anita, and I playing a piccolo duet with our flute choir at our "Divas" concert.  I really enjoyed playing this concert. Being able to be with friends and just have fun is a highlight for me and why I still play flute even though it is painful to do so.  (Just in case you were wondering, that giant vertical flute you see back there is a sub contrabass flute.)

I don't like to eat dinner before I play my flute. I have a harder time breathing and filling up my lungs as much as I need on a full stomach. When I get home on Monday and Tuesdays, I make myself something to eat. I warm up leftovers or make a sandwich. Again, the reaching, stretching and bending is all very painful. My hands are stiff, sore and swollen. I'm clumsy and I have to move slow, but I'm so exhausted and I just want to get something to eat and go to bed.

Wednesday or Thursday I have that afternoon flute quartet rehearsal, also another two hours. I'm still sore and hurting from Monday and Tuesday. The pain builds up over the week. By Friday, I generally need a nap midday to recharge. I feel guilty taking it even though I know I need it. I'm usually depressed by Friday too, having dealt with so much pain day-in-and-day-out. The depression increases when I take the time I need to recharge because of the guilt I feel. I'm still working on not feeling guilty when doing self-care. It's a process.

By bedtime, I'm absolutely exhausted and in a world of pain. I have to let the dogs out one last time and that blast of cold air makes me stiff and the pain is like fire coursing through me. Then I have to take those 15 steps upstairs and they seem like an insurmountable mountain at this point. But I do it, breathing like a maniac at the top, feeling dizzy again. I stumble to my bedroom and put my drink on my nightstand, joints popping the whole way. I brush my teeth knowing that it will cause more pain and that the taste of the toothpaste burns and makes stars pop in front of my eyes.  I take showers at night to help relax my muscles and calm my nerves and so I don't have to dry my hair because that is just one more thing to do that exhausts me. I'll sleep on it wet instead. Then I stumble to bed to take my meds out of my nightstand. My top drawer is a bit stiff and I have to yank it harder, my elbow pops. Twisting open my medicine caps causes pain in my wrists and hand. I have issues grabbing the tiny pills. I take out the three I need then place them in my hand and swallow all of them at once with a swig of water. They are all small but the swallowing still causes pain. I blow my nose and my chest aches. I shake my allergy spray and my shoulder catches and causes searing pain. I spray the nasal mist into my nose and it burns. The taste is metallic and overwhelming when it hits the back of my tongue, it makes me gag. But without it, my allergies are horrible.

Finding a comfortable position to sleep in is a task in and of itself. I toss and turn for hours. I'm sensitive to temperature and when I was younger, my room had to be like a sauna in order for me to be warm enough to sleep. Now that I'm older, I can't get too hot when I sleep or it causes me to toss and turn more. Perhaps it's age or maybe it's just a better insulated and newer house--either way, it's a battle every night. On average, it takes me 3 hours to fall asleep, despite how exhausted I am. I have sleeping pills but don't take them often. I'm afraid I'll become dependent on them. I have sleeping disorders like most Fibromyalgics. When my brain gets to that last stage of sleep, deep sleep, it wakes up. Sometimes I fully wake up, but I'm so used to it now my brain just kicks me back to the first stage of sleep. I spend the whole night attempting to fall into deep sleep. It's exhausting. Not having that last stage of sleep is what causes my immune system to be depressed. In that last stage of sleep, your immune system stops healing your body and heals itself instead. My immune system never really gets much of a chance to do that. Thanks to this weird quirk, FMS was finally classified as an autoimmune disorder.

Fibromyalgia is also affected by season changes and weather pattern changes. Every change causes me to feel more pain. And then I'm also sick half of the year. When I'm sick, I'm in a lot more pain. I'm also more exhausted. Sometimes I can work through it, other times I need a nap, but when it's really bad, I spend the day in bed, crying in pain. My allergies are year round but flare up even worse when everyone else's allergies decide to show up. I'm prone to sinus infections which turn into bronchitis. Playing flute has made my diaphragm strong so when I cough, it's a strong cough. Continual coughing rips my throat up and then my lungs. I've spit up blood from both so many times it's insane. I have scar tissue on my lungs from it. Taking all those allergy pills and cold meds drys me up too. I get nosebleeds often.

Me, my sister and brother-in-law with my Oma (grandmother) at her last Christmas. Holidays are special. I just enjoy the moment and my pain lessens from all the happiness and love. 

I'm prone to migraines. The more exhausted and in pain I am, the more likely I am to get a migraine. Excedrine Migraine is the only medicine that helps. But it thins your blood so when I get nosebleeds, they are bloody and long. The longest one I had was 40 minutes. The blood was pouring out of my nose. I gave up using tissues and just hung my head over the sink for a good portion of those 40 minutes.

When the "Fibro Fog" is bad, my brain moves like molasses. It can be as simple as forgetting a word and as bad as forgetting what the shampoo is for while in the shower. I've driven to the end of my street and forgotten where I'm going or how to get to where I'm going. One time I assembled a chicken casserole to cook in the over, then walked out of the kitchen to the laundry room and opened the dryer. I stood there for five minutes wondering why it didn't look quite right and wondering what happened to my oven rack when I realized that was not the oven. Sometimes I also have problems controlling the movements of my mouth and my words come out jumbled and mushy.

I have weight issues and a digestive system that is always out of wack. I am prone to panic and anxiety attacks, my nails are brittle, my hair falls out more than it should and my vision acuity changes depending on the lighting. Under harsh lights like fluorescents, my vision is blurry. Outside in the sunlight I can see clearly for miles and miles. Switching from near focus to far focus is a slow process for my eyes. Sometimes it takes several minutes to accommodate and other times it takes nearly an hour. The muscles that controls my eye movement is one of the most painful parts of my body. I find myself turning my whole head or body to look at things instead of just moving my eyes.

I think I often keep myself busy as a way to focus my brain on things other than the pain and exhaustion of FMS. In quiet moments, I find myself tuning in to my body and realizing just how much pain I'm in and it can be overwhelming. I get a bit of a glassy look to my eyes. It's good to do a check-in with yourself, yes, but I always have to steel myself for these moments. If it catches me off guard it's almost too much to take in.

Having Fibromyalgia is a daily, delicate balance, like walking a tight rope. I'm constantly weighing my options, thinking of the consequences. It has changed my life completely. I think it is one of the reasons I decided not to get my degree in Music and become a professional flute player. But it isn't all bad. I like to think it has made me stronger and more resilient. I also can tell three days in advance of everyone else in my family that the milk is starting to go bad thanks to my amplified senses, and that is kind of handy.

Three generations of women on my sister's wedding day. I was so busy doing things and enjoying the moment my pain went to the back burner of my brain. I live for these moments. It's a sort of non-medicinal relief. I also lost a lot of weight for this and it definitely helps not being so overweight. 

But FMS isn't something I would wish on my worst enemy. I don't see a cure for it any time soon, nor any real treatment. I learned in college that the co-morbidity rate (the rate at which having one disorder makes it more likely you'll get another that will kill you prematurely) is 99 percent for FMS. For me, it's not a matter of if I get Lupus or some sort of cancer, it's when. I've had to come to terms with that and I easily made my peace with it. For my friends and family that know about that, I'm not sure they have come to terms with it as easily as I have.

For now, I choose to live in the moment. I want to drink in as many of those wonderfully delicious, happy moments that I can. I love food even though it hurts to eat and drink. I laugh even though it makes my chest feel like it's on fire and I want hugs even though someone squeezing me hurts. Because I want it all: the good, the bad and the painful.


5:28 PM No comments
Halloween is a fun time to use your imagination and dress up your house.  I'm not much into the really creepy or gory parts of Halloween.  I prefer not to completely scare the you-know-what out of the youngest kids.  It would leave me with too much candy.  Plus, it just isn't my style.  I love vintage things, especially from the Victorian era. I also love anything related to Edgar Allen Poe.  If you missed my last post, check it out to see what I mean!


Last year we decided to make our own Dead & Breakfast sign for our new house.  I named my  Dead & Breakfast "The Raven Talon."  (Poe reference!) Since we were kind of winging it as we went, I didn't take photos of my process.  Luckily, my aunt wants her own Dead & Breakfast sign for this Halloween.  So this tutorial will take you through the process of making her sign.

You won't need many super specialized supplies, but a power drill/screwdriver combo will come in handy for this project.  After moving in to our new house, my mom and I bought one and we wondered why we hadn't bought one sooner!  Hanging curtain rods is a breeze now!

Watch our video below and read through the blog post to create your own Dead & Breakfast sign!


Supplies:
  • 1 bannister post (I purchased a reclaimed one from my local Habitat for Humanity Restore)
  • 1 unfinished wood sign plaque (I purchased mine from Michael's, the Art Minds Plaque, 11.9" x 0.7" x 19.9")
  • 1 square wooden panel, 12" x 12" (I purchased this from Michael's)
  • 2x4 cut slightly wider than the width of your sign (in my case, between 13" and 13.5")
  • Outdoor "chalk" (can purchase at craft stores like Michael's), acrylic or latex paint in black and white (or light grey)
  • Paintbrushes
  • Fine grit sandpaper
  • 1 4-pack of corner braces with screws, 3" x 3/4"
  • 4 corner brackets, 4" x 7/8"
  • 16 wood screws, flat Phillips #8 x 1 3/4" 
  • Black metal chain used for hanging lighting
  • 2 eye screws, #8 x 1 5/8" 
  • 2 eye screws, #12 x 1 3/16" 
  • 4 S hooks, 0.120" x 1"
  • Dead & Breakfast template
  • Vinyl and transfer tape or some other text transfer method (see below for more options)
  • Drill with various sizes of drill bits (I use the Black + Decker 20 Volt Cordless Drill with Auto Sense Technology and the Black + Decker 20-Piece High-Speed Steel Twist Drill Bit Set)
  • Power screwdriver or hand screwdriver
  • Pliers 
  • Hand saw or circular saw
  • Dremel tool with cutting attachment or good metal cutters
  • Pencil or marker
  • Spotlight (optional)
  • Resin raven or other Halloween figurine (optional)
  • Thin gauge wire (optional)
  • E6000 glue (optional) 


1. Gather Your Supplies

I highly recommend purchasing a reclaimed banister post.  Even if it is covered in varnish, you won't have to worry about sanding it down as long as you paint it with outdoor chalk paint.  I just love the character that comes with reclaimed items--if only those posts could talk!  The stories they would tell!  We purchased ours from our local Habitat for Humanity Restore, which I love.  The prices can't be beat and all the money goes to the Habitat for Humanity Charity!  The post was cheaper than a brand new one at the hardware store plus the proceeds go to charity.

The unfinished wooden sign plaque, square wooden panel, outdoor chalk paint paintbrushes and E6000 glue I purchased from Michael's.  The 2x4, L brackets, wood screws, hook screws and metal chain can be purchased at your local hardware store.  I purchased mine from Lowe's.  You can have them cut your 2x4 down to the length needed at the store if needed.  I used vinyl to transfer my sign lettering and luckily I had some old vinyl on hand already.  The resin raven on my D&B sign I also purchased from Michael's.  The resin figure is completely optional, but I figured on my own Raven Talon D&B sign, I needed a raven.  It just wouldn't be complete without one!  For my aunt's sign, I'm going to heat and twist some plastic bones to attach to the top of the sign instead of a raven.

For the lettering of the sign, I used the free template from Paint Yourself a Smile blog.  Just download the template and drop in your own personalized text!  A simple photo or image editor is all you need. I used Adobe Illustrator and exported my file as an SVG file so I could open it in my die cut machine software.


2. Paint Your Sign

Once you have all your supplies, you can start making your sign! The first step is to paint your sign plaque.  Remember that if you are mixing white paint with a tiny bit of black paint to create light grey, to mix up enough to paint all the different pieces of the sign.

If you are using the vinyl transfer method, you will want to start by painting your entire sign plaque black. Then, use your die cut machine (I used my Silhouette Cameo) to cut the vinyl to create a stencil, weeding out excess vinyl.  Using transfer tape, transfer the lettering onto the sign plaque. Next, paint your sign plaque a very light grey by either mixing some white paint with just a tiny bit of black paint or using a purchased grey paint. Paint your sign plaque and when the paint becomes tacky, use a weeding tool to lift the vinyl lettering off of the sign.  You might need to do touchups with some black paint and a small paintbrush after the grey paint fully dries.  It depends on the texture of your sign and how thin and delicate the lettering is.

If you are using a different transfer method, start by painting your entire sign plaque light grey.  Paint Yourself a Smile blog has a good way to transfer her template on to your sign.  She also includes a link to some other great transfer methods for faking chalkboard art that is more vibrant.  Super cool!


3. Weather it

If you used the vinyl transfer method, we'll be sanding.  Once your sign is fully dry on all sides, use a light grit sandpaper to lightly sand down.  This will help bring some of that black out to age and weather your sign.  You can also add some dry-brushed black paint as well.  The back of my sign didn't sand as easily and it can be hard to get the sides without completely removing all layers of paint.  I dry-brushed black paint onto the back and sides of my sign.

If you used another transfer method, use some black paint and a dry brush technique to lightly add some age and weathering to your sign.

4. Paint the Other Parts

Once you are done making your sign, it's time to paint the rest of your wood (base, post and 2x4) in the same light grey color.  If you purchased a reclaimed post, lightly sand the post before painting.  All of the wood you paint may need more than one coat, it just depends on how dry the area you live in is, or how dry the wood is.  Once all of your wooden pieces are dry use some fine grit sandpaper to add a distressed look to your wood or dry brush black paint over your pieces, or do a mix of both.  It's really up to you and what you prefer.  


5.  Assemble It

Now it's time to attach the post to the base. For this you will need the 4 larger corner braces, or L brackets.  Get your post centered up on the base and have a someone hold it in place for you.  Next, mark the location of your screws in the base and on the post for your L brackets with a pencil or marker.  If you have a side of the post where there are large holes for attaching the other parts of the bannister, you will need to attach your L bracket off to the side of the hole on the post.

After you have marked where your screws will go, use your drill to create a pilot hole that is slightly smaller in diameter than your screws.  For the base, I used a 5/64 drill bit and for the bannister I used a 7/64 drill bit.  The birch base is a softer wood so go small here--the pilot hole does not need to be very wide.  If your bannister is made of a very dense or hard wood, you will feel a lot of resistance.  Just apply firm pressure with your drill.  Make sure to drill a pilot hole that is a little shorter than your screws as well.

Once you have your pilot holes in place, begin attaching your base and post together with your brackets and wood screws.  You will use the shorter wood screws supplied in the bag for the smaller corner braces for attaching the L bracket to your base and the longer wood screws (#8 x 1 3/4") for attaching to your banister post.  Make sure to have someone help hold the post in place while you attach the screws with your power screwdriver or hand screwdriver.

Next, we will attach the 2x4 the sign plaque hangs on near the top of the banister post.  For this you will need your final two corner braces--the smaller ones from the bag of 4.  Create a U shape with your L brackets and hold them up to your post with opening facing out and the bottom of the U against the banister post.  Center it where you want it then mark where your screws will be placed.  Again drill a pilot hole (I used a 7/64 drill bit for the small screws that came with these brackets) for each screw then attach your U'd corner brackets to your post with the supplied screws in the bag or with extra of the longer wood screws.

Now we will wedge the 2x4 into the opening of the U shaped corner brackets.  Have someone hold the post while you push it in there.  If it is a tight squeeze, that is okay.  Just use a rubber mallet or a towel placed over the end of the 2x4 and a hammer to gently tap the 2x4 into place.  You want the 2x4 to be flush against the bottom of the U of the brackets and the post.  Once you have the 2x4 in place, use your drill to create a small pilot hole in each screw location.  I used the screws that came with these brackets and a 7/64 drill bit.  (If you can easily pull your 2x4 in and out, mark your pilot holes and pull it out and drill the pilot holes then re-insert the 2x4.)  Then insert your screws and tighten.


Now take your small eye screws (#12) and determine the best placement for them in the top of your sign.  This will depend on the shape of your sign.  If you are worried about wind, try to get the two eye screws as far apart as possible for more stability.  Mark where you will insert your eye screws.  Depending on how hard your sign is, you might need to drill some small pilot holes.  Remember not to go to deep when doing this.  Twist in your eye screws until they are nice and tight, using a wrench to help you tighten them.

Next we will attach the large eye screws to the bottom of the 2x4.  Hold your sign up so the two small eye hooks touch the bottom of the post and make a mark where the small eye screws touch the 2x4.  Drill two pilot holes, making sure to not drill deeper than the eye screw.  Twist in your large eye screws, using a wrench to help you tighten them.

Now we will determine the length of chain needed.  You will be using the four S hooks to attach the chains to the 4 eye hooks.  Once you figure out the length of the chain (I used 2 links), use your Dremel tool and cutter attachment or good metal cutters to cut/clip your two chains to the desired length.  Attach an S hook to each of the 4 eye hooks and pinch that part around the eye hook closed.  Next, attach a chain to one of the S hooks on the sign and pinch that part of the S hook again.  Repeat for the other S hook on the sign then attach the chains to each of the corresponding S hooks on the 2x4 and pinch each closed with pliers.


6. Add Some Decoration to the Top

If you want to attach something like a raven to the top of your 2x4, make sure that it is made of resin or similar material.  You want it to be something that weathers well and is easy to repaint (it snows in October where I live, so that was a big concern for me).  To attach the figurine, we'll be using E6000 glue.  This stuff is amazing!  You will want to figure out how you want to place your figurine before putting any glue down.  Just follow the directions on the packaging to attach your figurine to your D&B sign.  If you want some added stability and to help hold the item in place while the glue dries, you can use some thin gauge wire to hold your figurine to the 2x4.  I did this with my own sign after immediately glueing down my raven.  I figured this would help make sure the raven stay put while the glue dried and apply some pressure, bringing the two pieces together nicely.  You can always cut this wire off later or paint over it to hide it.  I've left my wire on for now.  You only see it over the raven's feet when you get up close as I used a white wire.


7. Display Your Masterpiece

When you place it outside, cover the base in rocks (I made sure to put at least one larger heavy one over the base) or place something else heavy on the base, such as an un-carved large pumpkin or a pot of chrysanthemums.  The finishing touch is to light it up with a spotlight if needed.  I went to my local party store (you could also check out Spirit Halloween or any other store that sells Halloween lights) and purchased a purple spotlight that I plugged into a sun sensor/timer so it would turn on after sunset and stay on for a certain number of hours.  I loved the spooky feeling the purple light gave the sign.

As for how well the sign weathered, last year, I put my sign out on the first of October and put it back into storage the day after Halloween.  We didn't have too much rain this past October and basically no snow, but the sign and my resin raven weathered wonderfully.  The whole thing still looks brand new, other than the little bit of dirt that collected on the base due to small amounts of moisture and my base being covered by rocks.  Overall, I'm so happy with how this sign turned out and how well it weathered in the harsh Colorado elements.


Comment below with a link to your own creation!  We can't wait to see what you have made!

Happy Crafting,
Adrienne


12:00 AM No comments
I love Halloween.  I really love Halloween.  I think my mom refers to it as OHD, or "Obsessive Halloween Disorder."  I go on Pinterest and pin Halloween related pins all year long.  After Halloween, I immediately begin thinking of what crafts I want to do for next year's Halloween.

But I love that Halloween requires so much imagination.  You get to have some fun and be a little weird and no one can say anything about it.  It also gives me a chance to use my crafty home decor DIY skills!

Last year was our very first Halloween in our new house.  I eagerly pulled out my Halloween decor from previous years to decorate the inside.  But mostly, we were really excited to decorate our porch. We love to do themes and all of my inside decor was based off of Edgar Allen Poe's "The Raven" poem.  I have tons of faux black birds, handmade apothecary bottles (to keep with Poe's love of the morbid and death) and a purchased copy of the complete anthology of Poe.

Yes, I'm obsessed with Edgar Allen Poe...
So of course the porch had to match my Raven theme.  I had come across a pin on Pinterest for a DIY "Dead & Breakfast" sign and both my mom and I thought that would be perfect.  So I created my own "Raven Talon Dead & Breakfast" sign along with a few other Poe themed crafts.

We'll start this tour inside though.  In the living room, I decorated the mantle with my handmade "Spooky" banner and a glimmer string featuring caged ravens.


I also added some pumpkins on the mantle and cabinets, as well as some ravens, a spooky eye, rats, handmade beaded spiders, a Poe shadowbox and a Poe themed altered coffin.


One of the new pieces I made for our first Halloween in our new house.  This Poe shadowbox features a sparkly raven, tiny poison bottles, the grave of the beautiful Lenore and a spider's web.

The Poe themed altered coffin I created for our first Halloween in the new house.  I covered the entire coffin in Halloween themed papers, added a framed photo of Poe himself, a skeleton and a raven.  
The front of the coffin lid is covered in a pretty lace that has loops of black elastic that can wrap around a brad on the side of each coffin to keep the lid closed.
Next to the fireplace on the floor, I added a few faux pumpkins (some covered in lacy Martha Stewart pumpkin sleeves) and an arrangement of faux flowers.  I also added my black scroll tree that I bough many years ago at Christmas.  I like it because it is something that can be used for Halloween as well.


We bought these velvet pumpkins but I've made my own for this year.  I even dried and saved my real pumpkin stems!
On to the dining room!  Since my birthday is in the fall, my mom gave me a fabulous table runner from Pier 1 that I had been eyeing for some time.  I just love the beaded ravens on it.  I also added my large black candelabra to the center of the table and placed my faux LED taper candles in it.


The table was set with our usual persimmon and teal placemats and chargers.  But I brought out my crow plates. (they were as close to ravens as I could find and got them at Home Goods). Each place setting also got a glitter tarantula on the napkin.  I set out my skeleton hand serve ware, placed a "poisoned apple" and some moss under a little cupcake dome, added some faux ravens and a few of the glass pumpkins that my mom has collected.


The kitchen island featured our black lace metal tiered server full of fun goodies:  small gourds, a resin skeleton hand, beaded spiders, a faux black owl, pumpkins, a primitive mouse on a candy corn, wooden ravens and fall colored M&Ms in glass jars.


Next to my essential oil diffuser, I placed a faux raven, an old beaker, some bottles with fun Halloween labels and a faux lace pumpkin.  I put a few drops of Raven essential oil in my Aria diffuser and turned it on with a purple light.  It looks a bit like a crystal ball (though I think I need to actually make one of the those for next year)...


Over in the window behind the stove my mom added her glamorous ceramic pumpkins on some glass candlesticks.  The glass candlesticks caught the afternoon light wonderfully in the window...

Our cute little snail is poking out to say hello in this photo!  My mom received her as a birthday gift from my sister and brother-in-law.  It reminded my mom of something she would find in a little shop in Austria.  
The entryway got a glass pumpkin candy jar that I had DIYed a mercury glass effect to and filled with some mini skulls, a tray with a potion bottle, small skull and a primitive raven on an old mattress spring.  The mirror got a glitter tarantula and some faux spider webbing.  I placed a faux raven on top of the lamp too.  (You can never have too many ravens!)


I also made a few of my own apothecary potion bottles and spread them throughout the house.

These are 3 of the potion bottles.  
I added this to the kitchen island later after making it.  Purple glitter potion named after the beautiful Lenore!
Now we are getting into some of the newer stuff!  We wanted the study to look like the lobby of our Dead & Breakfast.  So we bought a posable skeleton that would be our bellhop and sit behind the "lobby desk."  We made him a bellhop cap and made him hold a ring of skeleton keys.


We also hung some fun prints, stacked some luggage and books, added tarot cards, a teapot and a vintage teacup, ravens, a sign in book and inkwell with feather pen and my Poe anthology.


If you look closely, Edgar A. Poe was the last person to check in to the Raven Talon Dead & Breakfast...

In the corner, we placed my skull with faux floral arrangement.  Last time I had it out for Halloween, I had dried some flowers for it.  I then threw them out after Halloween was over.  This time, I opted to put in faux flowers and chose plenty of black roses and stems then added a few white ones for some contrast.


Then we covered everything in faux spider webbing.  I even gave some of the ravens some sparkly jewelry.  Real ravens love sparkly things and will collect them.

The window in the office got some tattered material, a vacancy sign, some ravens, rats, snakes and a few other items.


I hung some ravens to make them look like they were flying.  This little guy even got some sparkly jewelry he has stolen from one of our "guests!"
Here you can get a little peak of what we have out on our porch!
Even my dog Magnus liked to look outside on our creepy little porch scene.
Here is our porch outside on Halloween just before the sun set!


And the star of our decorations--my DIY "Raven Talon Dead & Breakfast" sign.  We purchased a banister post from our local Habitat for Humanity ReStore and I used a free design online for the sign that I altered a little bit for the custom name.  Then, we found the perfect raven to add to the top of the post--a resin one!  This way, he won't get damaged when it rains or snows (thank you, Colorado weather)!

Our next blog post will be a step-by-step process on how to make your own Dead & Breakfast sign like this one and will feature the sign I am making for my Aunt.  (She loved this one so much she wanted her own.)  It will also include the link to the image I used for the sign lettering.  

This picture was taken earlier in the month when I had my mums down by the sign.  Look how gorgeous those mums are!  Almost as pretty as my DIY sign!
Just behind the sign, we had a fun black twig garland on the banister along with some bows and purple sparkly sprays.  We added our "Potions for Sale" sign as well as some purple string lights.  We displayed our metal crows as well as plenty of real and fake pumpkins.

We chose real pumpkins with fun stems from our local pumpkin farm.  We also wanted some with some character and imperfections.  We also bought a few pumpkins from some stores that were warty looking too!  My poor mums were pretty much done blooming by the time Halloween night arrived so back up onto the porch the went with some pumpkins.  They kind of look like Mortica Adams' roses...


We made a tomato cage witch and lit her up with string lights inside her dress.  We brought out the cauldron and made it bubble with some green sparkly deco mesh and my fogger.  We chilled the fog inside the cauldron with frozen bottles of water to make the fog look like it was roiling and would fall to the ground once it came out of the cauldron.  We also added a Welcome sign we purchased at Joann's above our little witch.

The fog machine is hidden under the slatted box to allow air to flow.  We placed some orange lights under the cauldron as glowing embers and then added some pumpkins.  Don't you just love that warty one back there?!
The front door got a wreath that matched the garland on the bannister.  I added some silver sparkly sprays and of course a faux raven to it.  Our little witch left her broom in the corner by the door--we handmade this by scavenging for a fallen branch and some weeds near our house.


In the sidelight we hung some more spooky cloth, a handmade beaded spider and put a rat in the bottom of the window.  We filled our lanterns with glimmer strings and Christmas ornaments to make it look like spooky cauldron bubbles.  We also added some white rope light to the side of the house to help light up the entry way a bit more for the trick-or-treaters.


Here is a shot of the Dead & Breakfast lobby from outside after dark.  The trick-or-treaters really loved the scene we set for them!

I even made an elevator display for above our closet doors.  Can you see it back there?
Just under the window on the porch we set up a little scene on our outdoor furniture.  Inside an old suitcase is a blanket, skeleton parts and a tag that is labeled "Mr. Poe," because of course!  We also added our pillow with the skull wearing a hat and raven to the chair and placed a solar powered lantern on our garden stool.


And here is the whole scene lit up at night.  We lit our sign up with a purple spotlight and it threw a wonderfully spooky shadow across the front of the house!


And there it is, the full tour of our home decorated as a haunted Dead & Breakfast for Halloween.  I hope you enjoyed it!  I can't wait to make more fun decor items for this Halloween!  I'll leave you with this final photo of all my handmade beaded spiders gathered up since it was hard to see them in all the other photos.

The clear and pastel spider got hung on some fishing line in the sidelight while the others got spread around the house.  Aren't they pretty?  I had time to make a few extras to send to some friends and my cousin who also love Halloween as much as I do!

Happy Halloween Decorating!
Adrienne


12:00 AM No comments
Newer Posts
Older Posts

About Us

About Me


Welcome! We are a mother-daughter trio who loves Pinterest, baking and crafting. You'll find great recipes, stories about life, cleaning hacks and more on our blog.

Featured Post

Easy DIY Velvet Pumpkins

Follow Us

Labels

baking christmas cleaning crafts crockpot dessert elf on the shelf food halloween holidays home decor life makeup organization party

recent posts

Blog Archive

  • ▼  2022 (2)
    • ▼  February (1)
      • DIY Shabby Chic Valentine's Day Decor
    • ►  January (1)
  • ►  2021 (13)
    • ►  December (2)
    • ►  November (7)
    • ►  September (2)
    • ►  August (2)
  • ►  2020 (34)
    • ►  December (26)
    • ►  November (6)
    • ►  May (1)
    • ►  April (1)
  • ►  2019 (7)
    • ►  December (1)
    • ►  November (2)
    • ►  October (1)
    • ►  June (1)
    • ►  March (2)
  • ►  2018 (13)
    • ►  October (2)
    • ►  September (1)
    • ►  July (2)
    • ►  June (1)
    • ►  May (2)
    • ►  March (3)
    • ►  February (1)
    • ►  January (1)
  • ►  2017 (1)
    • ►  April (1)
  • ►  2016 (4)
    • ►  October (1)
    • ►  June (1)
    • ►  April (1)
    • ►  January (1)
  • ►  2015 (7)
    • ►  December (2)
    • ►  November (2)
    • ►  August (3)

Popular Posts

  • My Morning Skin Care Routine
  • My Night Time Skin Care Routine
  • Chocolate Bailey's Irish Cream Cake
  • Simple Soap & Water with Oil Cleaning Spray
  • Coconut Tres Leches Trifle

Created with by ThemeXpose